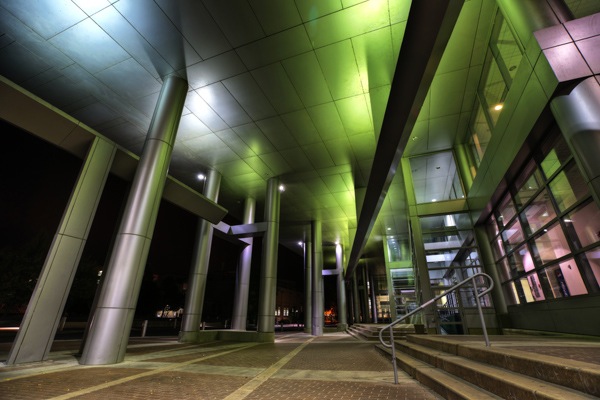
The idea of taking photographs at night can be counterintuitive to the novice photographer. After all, photography is an art, a craft, a technology that is wholly built on light. Film or digital, it doesn’t matter: we need light to make a photograph—it is as simple as that.
Night, of course, by very definition lacks the pervasive light of day, and therefore doesn’t seem like a good time for photography. In the broadest sense, this intuitive understanding of light and its importance to photography is absolutely correct. Night does represent a more challenging time to take pictures, because we lack all those wonderful photons barreling down from the sun and reflecting off everything interesting and into our waiting lenses.
However, note that I said “challenging” but not “impossible.” Indeed, nighttime photography is not only possible; it is wonderfully ripe for creative expression and can help you create genuinely unique looks in your work.
The Night in General
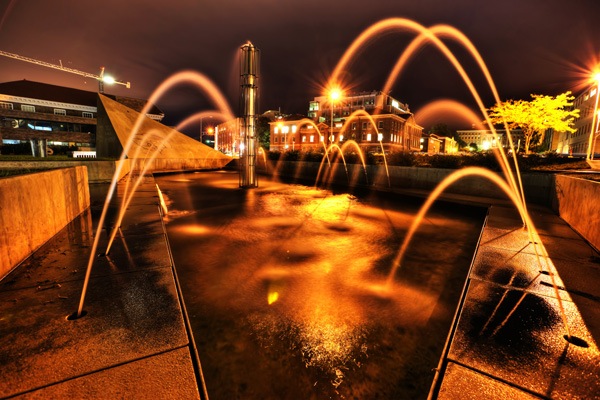
Take a moment, tonight, or whenever you have a chance, and go outside into the darkness long after the sun has gone down. Really open your eyes and observe, noting all the differences, all the unique things that set night apart from day. It is as simple as the lack of sunlight, but infinitely more complex than that breezy statement would suggest.
Pay attention to the way the shadows have deepened and pooled, how colors are muted or rendered differently by the artificial light of streetlamps or the exposed bulb on your backyard porch. Notice how things feel, how significant just changing the time of day can be. That old oak tree that seems so friendly and comforting in the day can turn into a gnarled, malevolent specter at night. Or a car that during the day is simple and boring might become a gleaming chariot in the darkness. The possibilities are endless.
The City at Night
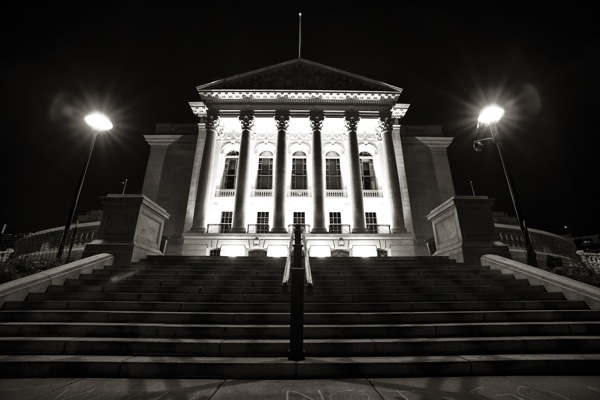
Cities are wonderful engines of creative possibility for the nighttime photographer. We lose the sunlight, but we gain thousands (or millions) of individual points of artificial light of every different color and tonal quality. We can (literally and figuratively) view our city in an entirely new light. The old and staid can become fascinating again as the changes in lighting shift the shadows and alter the textures and wring out, or completely change, the colors.
And all these bright points of artificial light give our cameras something to gather and turn into a photograph.
Great. So…What Do I Do?
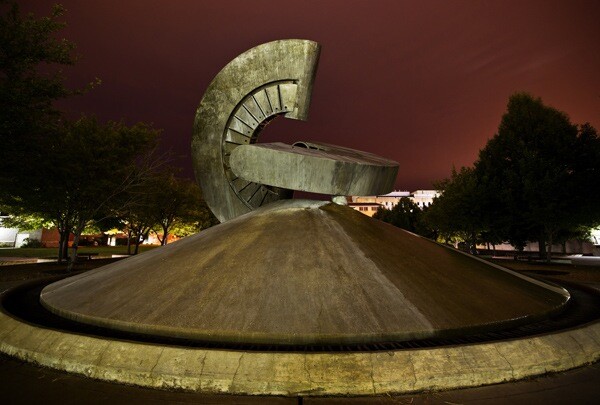
I’m going to try to distill my experiences from my nighttime cityscape photography outings into a series of recommendations, aimed at giving you the best possible chance to get that shot, the one you really want, full of color and deep shadows and crazy lighting that showcases your city in a whole new way.
Bring the Right Gear
I’m not going to categorically deny that you can take great nightscapes with a compact digital camera. I will say that using a point and shoot is going to make getting that fantastic image of your dreams a lot harder.
I recommend the following:
• Tripod, sturdy but lightweight enough for you to carry around easily
• DSLR
• Remote shutter release
• Relatively fast wide angle lens (the wide angle part is optional, but what I recommend to get the most dramatic shots of the architecture and streets of your city)
• Lens hood (to reduce lens flare from outside-the-frame light sources)
• DSLR
• Remote shutter release
• Relatively fast wide angle lens (the wide angle part is optional, but what I recommend to get the most dramatic shots of the architecture and streets of your city)
• Lens hood (to reduce lens flare from outside-the-frame light sources)
Note that I didn’t say “flashlight.” This article assumes you are in the city, which, barring unforeseen power outages, should have light enough for you to see by and make your way around. That may vary by city, however, so bring a flashlight if you feel you’ll need one, or if you plan on doing “light painting” with it.
Know the Gear You Brought
Things will be dark. It’s nighttime. So make sure you know how to operate your DSLR in minimum light and with little fuss. If your camera has the ability, make use of custom modes to have your settings in place and ready to go ahead of time. Also be able to fit your remote shutter cable onto your camera, and your camera onto your tripod, in the dark (and both of those back off again).
Going further, try to get to know your lens(es) and your camera with regard to how they behave in low light. Some DSLRs are better at autofocusing in dim light than others; you may need to manually focus for best results if the AF ends up endlessly searching (alternatively, point the camera the moon or some other distant light, let AF put the focus at infinity, recompose and shoot). DSLRs will also vary a great deal on how well they handle high ISO values and/or very long exposures (in terms of the level of noise in the resultant image). If you are looking to capture fast action in freeze-frame in a nighttime shot, you will inevitably need a high ISO level and probably a very wide aperture lens. Remember, a tripod can hold your camera solid and in place, but it has no effect on the movement of the subject matter.
This brings us to:
Know What You Want
Are you looking for a freeze-frame in the darkness? This is going to be tough – a technologically demanding task for your camera. You’ll have to set the ISO quite high and have a “fast” lens (one with a wide aperture, as noted above, like f/2.8 or f/1.7, etc). The result will necessarily have a very shallow depth of focus with potentially a lot of noise – things to keep in mind as you are shooting. You will also need a high ISO and fast aperture if you are trying to shoot handheld (without a tripod), something that is very possible, especially with newer, less noisy digital cameras, but be prepared to have do noise reduction in post!
If, instead, as is more commonly done, you want to create light trails from passing cars or use long exposures to really capture the fantastically different nighttime lighting, you can get away with using much lower ISO (e.g. 100) and a smaller aperture (f/8, for example) to enlarge your depth of field and minimize the ISO-induced noise. This will mean, commensurately, a longer exposure time: the shutter will remain open longer, letting those light trails form and also filling the frame with more detail as more photons are gathered by the imaging sensor. Bear in mind, however, that most DSLRs have an automatic shutter time cutoff of 30 seconds, so if you need longer to get a proper exposure you’ll need to know how to use the Bulb mode on your camera (where the shutter speed is determined by how long you hold down the shutter release button). In either case, you will need a tripod, because the exposure time will be much too long to keep still when hand-holding.
Also, keep in mind a fact of all digital sensors (so far): the longer the shutter is open, the more noise creeps up, regardless of ISO setting. To combat this you can set your camera to apply in-camera noise reduction. Many DSLRs do this automatically on longer exposures, and usually the time it takes to apply the NR is equivalent to however long the shutter was open. This is important to remember when you are out and about, because it means your camera is unusable for however long the NR is being applied.
Know Your City
Every city is different, in layout, points of interest, people and the overall character, and all of those elements (except the layout) change, sometimes drastically, when night falls.
You should be at least decently knowledgeable about the city you are attempting to shoot in before you make an excursion at night – or, at least, be with someone who does know. Big cities present nearly endless opportunities for architectural and artistic delights, delights that change and morph and become radically different when no longer lit by the sun, but by artificial lights. However, big cities can also be more dangerous, particularly at night, and especially for a photographer who is lugging around two to ten thousand dollars (or more) worth of equipment with them.
Therefore, for reasons of safety and for practicality, get to know your city before you tromp out with DSLRs hanging around your necks, tripods in hand and release shutter cables dangling. Go out in the day and get to know the streets and where the interesting buildings and parks and monuments and statues are; go out at night, without your camera, and see how all of those things look in the light of night.
Then, when you do take all your equipment out for the shoot, make sure to keep your eyes open. Be cognizant of your surroundings. Walk confidently, even assertively, so as not to be pegged as a tourist, mark or target for potential predators. Work in a group, or at least go with one other person who can watch your back, even if that other person is not a fellow photographer.
Or, do as I often do: go at times when most of the rest of the city is asleep. There are such times, even in those big cities that “never sleep.” When? I’ve found early—and I mean really early—Sunday mornings are the quietest possible times to tramp around the downtown. At 3:30 or 4:00 AM, after bar-close but well before sunrise (for most of the year), the night is just as dark and the light just as good—unless you are trying to shoot nightlife and people and cars, rather than architecture and light and shadow.
Shooting in the early morning also lets you capture a series that progresses from a pure black sky (or one with the moon and stars) to one of deepening purples and blues as the sun begins to rise, and finally gives you a chance to partake in the Magic Hour of sunrise itself. Yep, it means an early morning on a Sunday, but it’s the best time to go out if you want to encounter as few people as possible.
Know the Weather
Another important consideration in nightscape photography is the weather.
Cities at night can look absolutely amazing after a downpour has left the roads wet and gleaming with columns of reflected light. Snow can render a city almost post-apocalyptic at night, blanketing everything and colored by the lights of storefronts and parking lamps. But rain and snow, as they are coming down, are not great for cameras or lenses (or photographers, for that matter) if you aren’t probably prepared.
So be aware of what the skies are doing, and plan ahead. If it’s going to rain, bring waterproof clothing for you and protection for your camera. Watch the weather reports on the night you want to go out and see if you can time it so you hit the streets just after the rain has stopped, so you capture all the magical wetness without it fouling up your camera or lens. If it’s snowing, be prepared for the cold and, again, protect your gear.
Conclusion
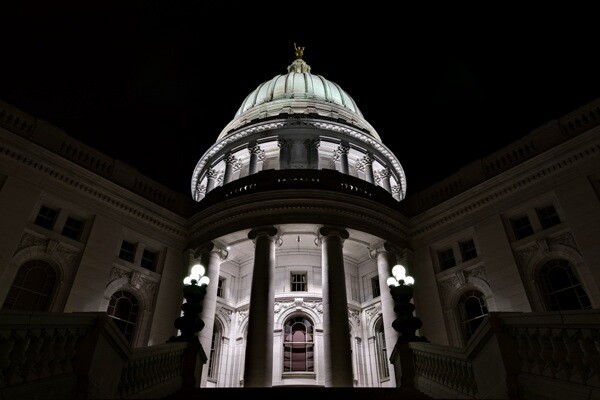
Nighttime cityscape photography can be a fantastic avenue for creative expression, and a way to make your images pop with unique feeling and life. The light and the shadow behave differently without the sun overhead, and the world, as a result, changes in tone and mood and expression. Streets turn black and shiny and are broken by orange circles of light from streetlamps. Shadows pool in alleys and the corners of buildings, and are stretched into new, looming figures and shapes by the bright light from a gas station or convenience store.
As a photographer, out at night in the city, the most important thing to remember is to stay safe. After that, keep your eyes open and your imagination working, and go after those amazing low-light shots. Try new things, bend and break the rules, have fun, and let the magic flow.
You might be surprised just how much you like what you come home with.See more of Joseph Eckert’s work his website.
Read more: http://www.digital-photography-school.com/nightscapes-photographing-the-city-at-night#ixzz1h9HhwHDJ
No comments:
Post a Comment